
Learn how to configure tomcat with IntelliJ IDEA for Java web development. This step-by-step guide covers setting up the project structure, managing dependencies, creating a servlet, and deploying your web application seamlessly.
Why Use Tomcat with IntelliJ IDEA?
IntelliJ IDEA is a powerful integrated development environment (IDE) that provides comprehensive support for Java web development. Apache Tomcat is a widely used open-source web server and servlet container that is perfect for Java applications. By connecting them, you get:
- Seamless deployment: Easily deploy your Java web applications directly from IntelliJ.
- Integrated debugging: Debug your applications within the IDE.
- Simplified configuration: Manage your server settings and configurations within a single environment.
Prerequisites
Before you start, ensure you have the following:
- IntelliJ IDEA: Download and install the latest version from JetBrains.
- Apache Tomcat: Download the latest version from Apache Tomcat. Make sure it’s extracted to a known location.
- JDK: Ensure you have a Java Development Kit (JDK) installed. IntelliJ IDEA should be configured to use it.
Step-by-Step Guide to Connect Tomcat with IntelliJ IDEA
Step 1: Install the Java EE and Web Development Plugin
- Open IntelliJ IDEA.
- Go to File > Settings (or IntelliJ IDEA > Preferences on macOS).
- Navigate to Plugins.
- Search for “Java EE and Web Development” and install it if it’s not already installed.
- Restart IntelliJ IDEA to activate the plugin.
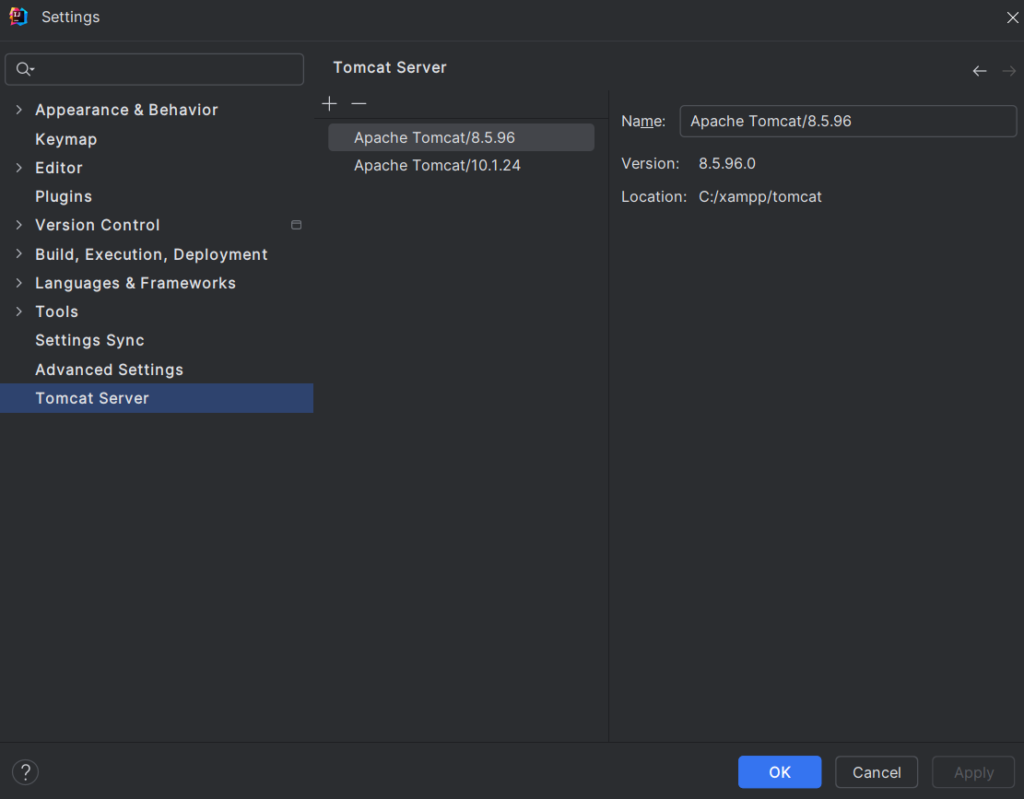
Step 2: Configure Apache Tomcat
- Go to File > Settings (or IntelliJ IDEA > Preferences on macOS).
- Navigate to Build, Execution, Deployment > Application Servers.
- Click the + icon to add a new server.
- Select Tomcat Server.
- Click the Configure button next to the Tomcat Home field and browse to the directory where you extracted Tomcat.
- Click OK to save the configuration.
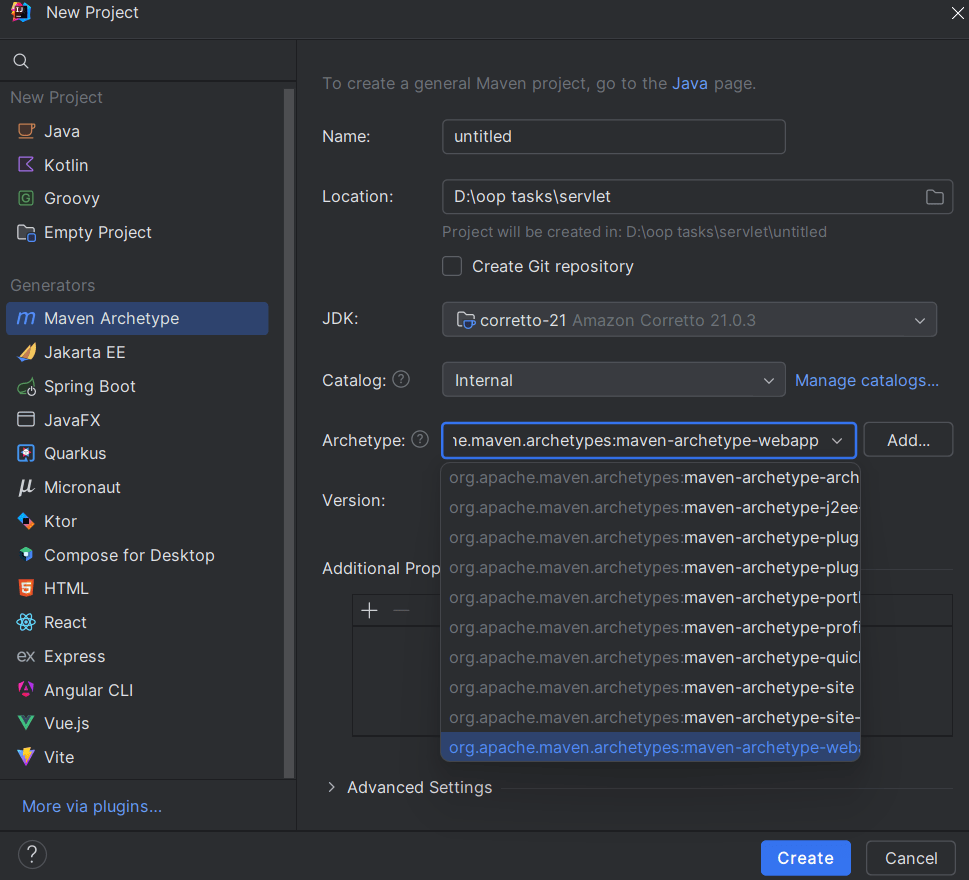
Step 3: Create a New Java Web Project
- Go to File > New > Project.
- Select Java Enterprise from the list of project templates.
- Check Web Application and click Next.
- Provide a Project Name and Location.
- Choose a Project SDK (select the JDK installed on your machine).
- Click Finish to create the project.
Step 4: Configure the Project for Tomcat
- Right-click the project in the Project Explorer and go to Add Framework Support.
- Select Web Application and click OK.
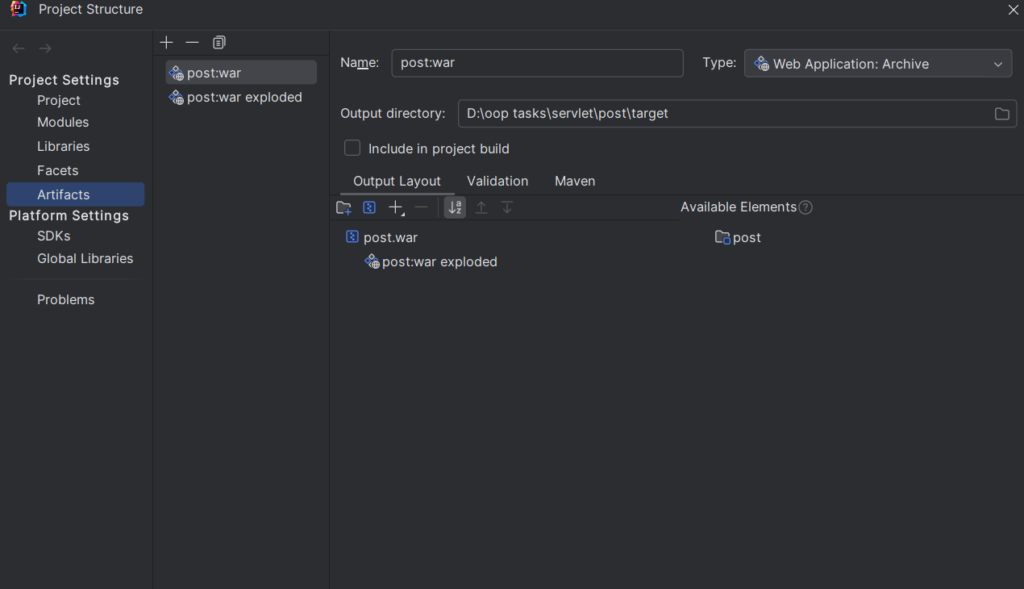
- Go to File > Project Structure.
- Navigate to Artifacts.
- Click the + icon and select Web Application: Exploded.
- In web Application: Exploded you will get two options :
- If you start with an empty configuration, you’ll need to manually add components like WEB-INF, classes, libraries, etc.
- If you select a module, IntelliJ will automatically populate the necessary directories and files.
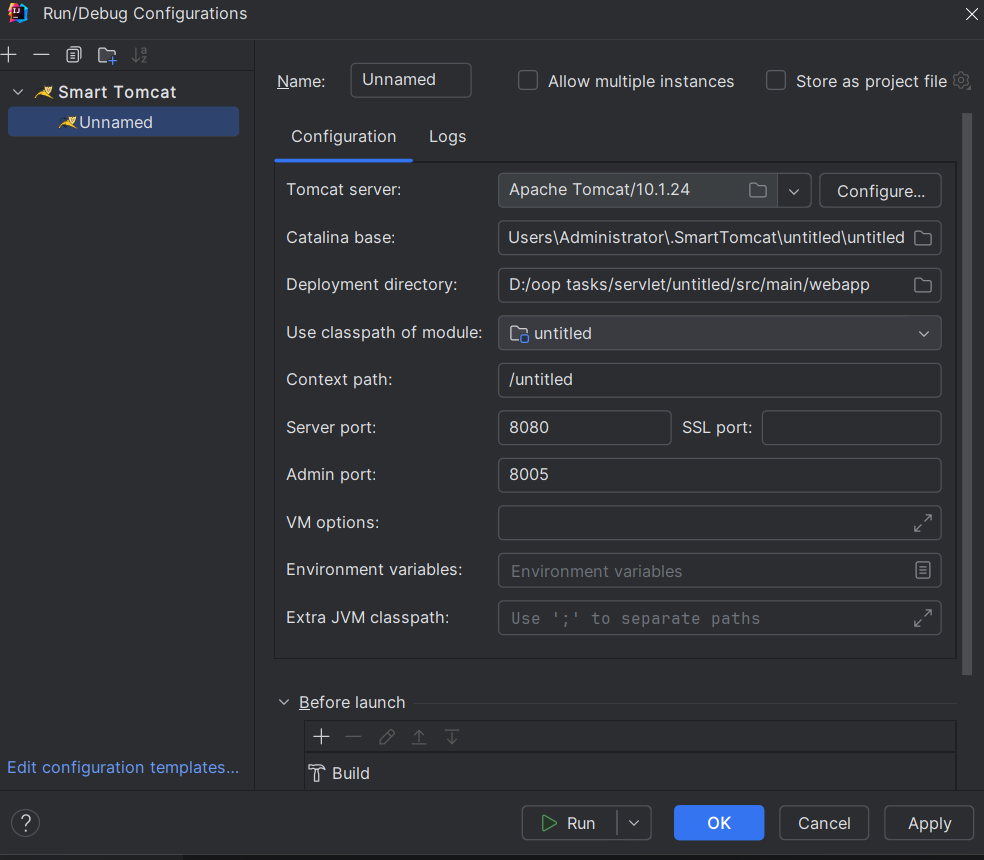
Step 5: Set Up the Tomcat Server in IntelliJ
- Go to Run > Edit Configurations.
- Click the + icon to add a new configuration.
- Select Tomcat Server > Local.
- Name your configuration (e.g.,
Tomcat_Dev). - Under the Deployment tab, click the + icon and add your previously created artifact.
- Under the Server tab, set the Application server to the Tomcat configuration you added earlier.
Step 6: Add Dependencies
Adding dependencies is crucial for ensuring your web application has access to all the necessary libraries. In a Maven-based project, you manage dependencies using the pom.xml file.
- Locate
pom.xml:- In the Project Explorer, find and open the
pom.xmlfile located in the root directory of your project.
- In the Project Explorer, find and open the
- Add Dependencies:
- Inside the
pom.xmlfile, locate the<dependencies>section.Add the required dependencies by including them within this section. For example, to add a dependency for thejavax.servlet-api, you would add:
- Inside the
<dependency>
      <groupId>jakarta.servlet</groupId>
      <artifactId>jakarta.servlet-api</artifactId>
      <version>5.0.0</version>
</dependency>- Reload Maven:
- After adding your dependencies, you need to reload your Maven project to download and apply the new dependencies.
- Go to the Maven tool window on the right side of IntelliJ IDEA.
- Click the Reload button (two arrows forming a circle) to update the project.
First project of Apache Tomcat
Create a New Project:
- Go to File > New > Project.
- Choose Java Enterprise and select Web Application.
- Provide a Project Name and Location.
- Click Finish to create the project.
Project Structure:
Your project directory will have the following initial structure:
YourProject/
├── src/
│   ├── main/
│   │   ├──directory (java)/
│   │   │  ├──package (comexample)/
│   │   │   ├──class (firstServlet)/
│   │   ├── resources/
│   │   └── webapp/
│   │       └── WEB-INF/
└── pom.xml
Creating Packages and Classes
- Create a Package:
- Right-click the
javadirectory undersrc/mainand select New > Package. - Enter a package name, such as
com.example.myapp.
- Right-click the
- Create a Java Class:
- Right-click the newly created package and select New > Java Class.
- Enter a class name, such as
HelloWorldServlet.
- Navigate to WEB-INF:
- Go to
src/main/webapp/WEB-INF.
- Go to
- Create JSP File:
- Right-click
WEB-INFand select New > File. - Name the file
index.jsp.
- Right-click
NOTE
You can access the initial Tomcat project with dependencies from my GitHub repository:
Or download Zip File:
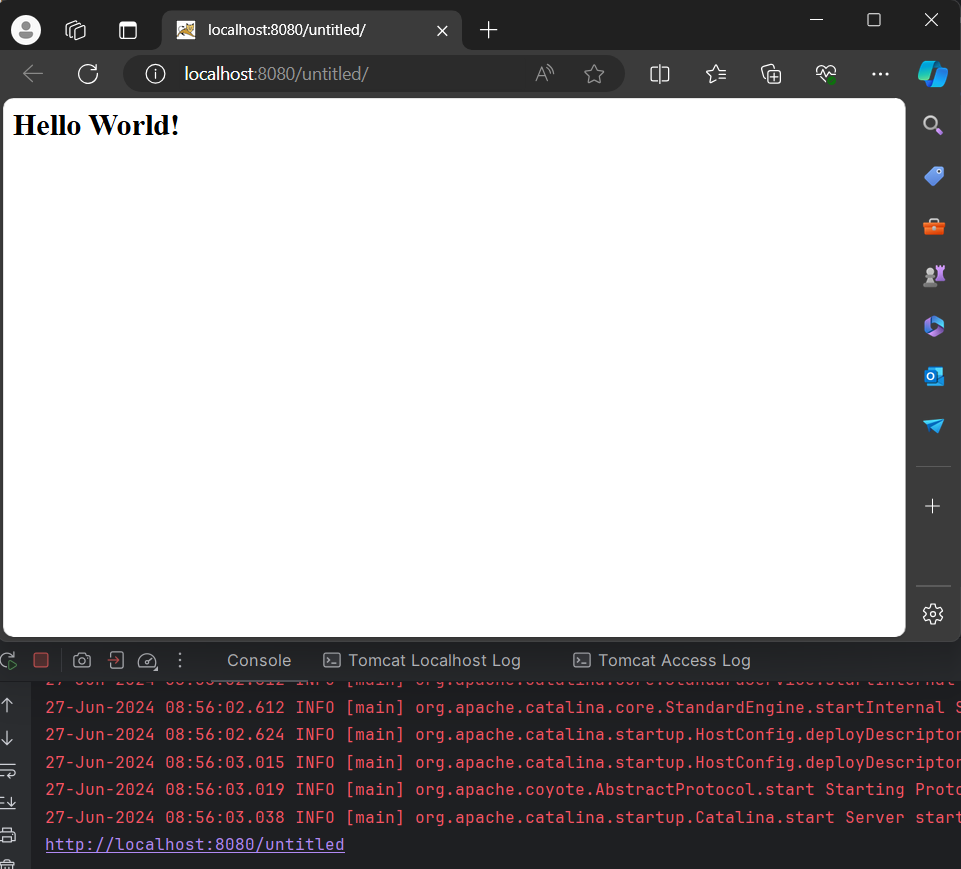
Step 7: Deploy and Run Your Application
- Click the Run button (green arrow) or press Shift + F10 to start the Tomcat server and deploy your application.
- IntelliJ IDEA will start the server, and your web application will be accessible through a browser.
- Then click on this click to see the
index.jspwelcome page.
Step 8: Debugging Your Application
- Set breakpoints in your code by clicking in the left margin of the editor.
- Click the Debug button (green bug icon) or press Shift + F9 to start the server in debug mode.
- The application will pause at your breakpoints, allowing you to inspect variables and step through your code.
Conclusion
By following these steps, you’ve successfully connected Apache Tomcat with IntelliJ IDEA. This setup enhances your development experience by enabling easy deployment, integrated debugging, and streamlined configuration management. Whether you’re a beginner or an experienced developer, this integration can greatly improve your productivity in Java web development.
FAQ
What is web.xml?
The web.xml file, also known as the deployment descriptor, is a configuration file for a Java web application. It describes how to configure servlets, filter mappings, and other settings for the application. It is located in the WEB-INF directory and is essential for mapping servlets to specific URLs.
What is Servlet?
A servlet is a Java class that handles HTTP requests and generates responses. It is a server-side component that processes requests from a web browser or other client, typically generating dynamic web content.
What is an Artifact?
In IntelliJ IDEA, an artifact is a build output, typically a WAR (Web Application Archive) or JAR (Java Archive) file, that is ready for deployment. An artifact represents the compiled code and associated resources that can be deployed to a web server, such as Tomcat.
Why Use Tomcat with IntelliJ IDEA?
IntelliJ IDEA is a powerful integrated development environment (IDE) that provides comprehensive support for Java web development. Apache Tomcat is a widely used open-source web server and servlet container that is perfect for Java applications.